Table of Contents
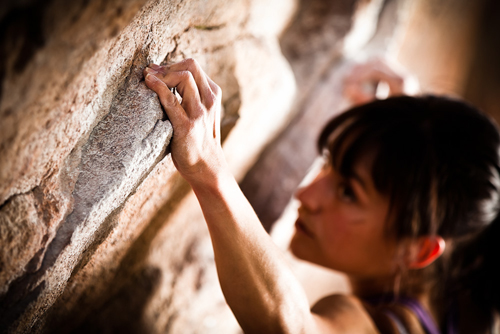
Taking a look at some photographs taken by professional mountain climbers.
While they scale these massive monuments of nature can take your breath away. Being able to capture the struggle of the climber slowly but surely making his/her way up the face of a mountain, risking life and limb for the thrill of the ascent, and the grandeur of the earth swelling up to the skies is its own big challenge.
If you are looking to rise to the heights where you can translate the sheer adrenaline rush, the gritty effort, and the beauty of nature with your digital camera into a picture, you’re going to need to read these following tips and techniques.
Equipment
The very first thing you need to realize when going on a mountain climbing photography trip is that you are putting yourself in a physically taxing situation with not as much leeway for setting up great shots. Because of this, you’ll want to pack less than usual. Stick to a couple of lenses, preferably a wide zoom and a long zoom.
Although you will probably be using a DSLR to get some really high quality photos, you can also bring along a simple point-and-shoot digital camera for the more dynamic shots where you’re actually climbing up the mountain. There’s just no way of snapping pictures with a DSLR while belaying, and there might be good photo opportunities that can be gone quickly.
If you have the options, go for a lighter DSLR that is weather resistant, especially if your shoot will be in a snowy high-altitude mountain. The temperatures in those areas drop rather quickly the higher you get, and your standard camera can easily stop functioning in the cold.
Some batteries lose their charge much faster in extreme temperatures even if you haven’t taken a single picture, so do your best to keep them warm. It is critical that you bring spares.Bring some heavy duty memory cards as well, since you’ll be taking a lot of pictures on the hike.
A UV filter will give your lenses some much-needed protection from the very harsh light near the tops of mountains, while also keeping them from getting scratched as you work your way up.A microfiber cloth is also very helpful in wiping away any dust or snow that might get on your lenses.
A pouch or a plastic bag that can be sealed to keep away water or dirt is essential for storing your gear. Having a sling to clip your camera to you or your harness will also be useful for those action shots on the rock face.
Lighting
It’s only natural that going up a mountain means dealing with a lot of light, more so with the peaks that go past the clouds. This might sound like a blessing at first, but the reality is that it can be much more of a disadvantage considering the stark amount of lighting that can damage your camera. Snow-covered mountains are doubly worse, as the light tends to reflect on the snow and the bits of uncovered dark rock mixed in the picture can screw up a camera’s exposure.
To avoid these problems (or at least most of them), your best bet in getting good lighting is to have your photo shoots done either early in the morning or late in the afternoon when the sun is about to set.
The light will be much warmer under these circumstances, and they also make for much more interesting photographs in their interplay with a mountain’s textures and the shadows it can cast.
Exposure
In conjunction with the lighting, you’ll have to be careful with your camera’s exposure particularly in the case of cold mountains. The issue though does not lie so much in adjusting the exposure on snow because today’s matrix meters for DSLRs are pretty good at making the right tweaks. It’s in the elements that don’t fall within the range of the snow’s brightness such as shadows, the rocks, and the climbers themselves, which can lead to bad photos with blown highlights.
To prevent that, you can put your camera’s stop to -0.7. It’s better to maintain the details in the snow and in the clouds, plus the darker elements can still look good despite having a little less light on them.
Shutter Speed
Your camera’s shutter speed will depend on what kind of picture you are going to take. For the landscape shots of the mountain and its background, you don’t have to think much about this setting. The only time you do have to tinker with the shutter speed is when you’re looking for an action shot.
In that case, your subjects will most likely be the climbers. To really bring out the energy in their climb, it’s sometimes better to have parts of the picture blurred such as a hand swinging an ice axe or a skier racing down the mountain. To achieve this effect, simply leave the shutter open longer.
Of course, the actual length will differ depending on your proximity to the subject as well as the actual speed of the action. The closer you are, the faster the shutter speed needs to be to get a freeze frame image of movement. It’s just a matter of finding the right balance of dynamism and detail, which can only be learned through experience.
Mountain climbing is an exhilarating experience, and communicating that feeling through just pictures is not going to be easy. It requires much more effort than you might previously be accustomed to for photography, but overcoming the physical and mental obstacles to produce awe-inspiring pictures is a remarkable and rewarding feat. Just remember to stay safe above all else, as there are real dangers you’ll be facing in such an environment.
Here are some amazing mountain climbing photos:


